Chocolate People

You may think this is a post about people who love chocolate and you won’t be entirely wrong.  But this post is actually about making people – even people you love – into chocolate.  This is a very fun project and it gets great reactions from everyone.  There’s nothing like, for example, eating your sister’s face (or, so my son informs me).

This can work with any good quality chocolate.  Chocosphere is a great chocolate resource where you can get pretty much any chocolate made around the world.  I favor Guittard and Valrhona.  Guittard A’peels work well too.

  1. Find a picture of your subject.
  2. If you have the ability to crop pictures (Adobe Photoshop or Elements, for instance) you can get a nice close up a face.
  3. Reduce the coloration so that you only have two-four colors.  In effect, posterizing the picture.
  4. Size the cropped face to whatever dimensions you want your end product to be.  For my daugher (pictured), I made the image about 3″ square.
  5. Replicate the face several times on a single sheet either by using Photoshop (create an empty 8″X11″ document and then copy the layer with your prepared image into it multiple times) or using a photocopy machine (cutting, pasting and copying to get as many as you wish)
  6. Place the multi-image page on a half-sheet pan or other suitable (i.e., washable) surface.
  7. Cover the page with plastic wrap.  Smooth it out as much as possible so you have no wrinkles.  You will be using the plastic wrap as the surface on which you build the face.
  8. Prepare as many  parchment paper pastry cones as colors you will using.  (Pretty good instructions for this here.)  Do not cut a hole in the bottom yet.
  9. Melt the darkest chocolate and fill one of the cones.  The easiest thing is to hold the cone in your non-dominant hand.  The parchment paper cone is pretty stiff so it should be easy to fill with a spoon or just pour from the container.
  10. Cut a teensy-tinsy hole in the parchment cone.
  11. Now the fun part: carefully outline the features with the melted chocolate.  If you find using the cone too cumbersome, you can use a fine watercolor brush.  Keep a pan of simmering water with a half-sheet on top so you can re-melt the chocolate on the brush.  Give the chocolate 5 minutes or so to harden a bit.
  12. If you’re using more colors, do the next level of details.  Bear in mind you’re working in reverse.  The chocolate you put down first will be the color that’s in front.
  13. Lastly, melt some white chocolate.  Since the white will be the background for the chocolate drawing you can either spoon it on and spread or use a parchment cone with a slightly larger hole cut.  Or a combination of both.
  14. Let the chocolate harden for at least 10 minutes.  Gingerly touch it with a finger.  If it’s still soft…wait longer.
  15. Now just peel your faces off the plastic!  You’ll be eating faces in no time now!

I will tell you that my daughter was delighted to be immortalized (or briefly rendered depending on how long you can hold off eating the face).  My sons are jealous and I’ve promised to do them too.  In fact, I can envision a whole chocolate family and then a weird face eating party of some sort.

Flank Steak on the Grill

I recently got a grill.  I never had one but lately it seems like everyone is touting grilling stuff.  Bobby Flay.  Mario Batali.  Alton Brown. We live in a townhouse and have a very small “yard.”  I’ve managed to squeeze in a nice container garden but there’s just not enough room to fit a regular size grill.  But Weber came to the rescue.  They now make the Q series of grills.  I got the Weber Q320.  Not only is it very cute but, as it turns out, it’s highly rated in all the places I checked, it can cook enough for 8 people (or so they claim), comes with a stand and is able to take a full-size propane tank.  And, it fits quite neatly a little space between my trash cans and a hedge.  It’s like it was made for me.

It arrived quickly and I started putting it together.  How hard could it be?  I had gotten as far as getting the wheels on when my husband came home.  He gave me the “there, there, little lady…step aside” look and took over.  Who am I to argue with a big, strong manly man?  With surprisingly little teeth-gnashing or cursing the grill was assembled and I was in business.

Since then, I’ve been grilling up a storm.  I really, really like the taste of food made on the grill.  I even make pizza on the grill now (see Pizza on the Grill – SSSmokin’) – it’s great.  Part of the fun is not being very experienced with grilling – I can experiment and there’s a good chance it’ll turn out fine.  Last night I had a flank steak that had been hanging around with no purpose in life for a week or so.  I figured now or never.  I had neither the time nor the inclination to braise or stew but, I thought, a marinade would do the trick.  The very word sounds so jolly.  Something you might read in a book about elves and fairies.  “They gleefully marinaded around the ancient tree.”

Anyway, I consulted a few sources on the Internet and my bookshelf but nothing quite seemed right.  So I drew from what I saw and threw together the following (measures are approximate):

  • 1/4 cup olive oil
  • 1/4 cup honey
  • 2 tsp salt
  • 2 cloves of garlic, smashed
  • 2 tbl. cider vinegar

I whisked it together, put the approximately 1 1/2 pound flank steak in a ziploc (I cut some slits in the meat to let the marinade get in), poured in the marinade, sealed it with as little air as possible and put it in the frig to marinate (if it wants to dance a little in there, so be it).  I had also read about Bobby Flay’s Perfect Fries and knew my husband would love that so I cut up a couple of potatoes and put them in water to soak (supposedly removes some of the starch).

I left the steak in there about 45 minutes, then turned on the grill to heat.  I also started the oil heating on the stove.  I figured I could cook the steak and while it rested, I would make the fries.  I pulled the steak out (I had turned it a couple of times to make sure it came in contact with the marinade) and liberally salted and peppered both sides.  The grill temperature was up to about 450 and I place the steak on.  It made that lovely hissing sound.  I cooked it about 3-4 minutes per side…it was pretty thin.  I checked the internal temperature and it was about 130…a little low but I was going to let it sit, tented, while I cooked the fries so I figured it was ready.  Took it into the house and tented it with foil.

The oil was now at 325 (as directed) and I fried the potatoes in two batches until they were limp’ish (as directed) and then took them out and put them on a wire rack inverted over paper towels (an idea from Alton Brown’s book I’m Just Here for the Eats).  Then I cranked up the heat under the oil until it reached 375 and fried the potatoes again.  I left them in until they were quite brown and crisp-looking.  Removed them with the skimmer and put them on the rack again.  Crisp “looking” is the operative term.  They were actually VERY limp.  And I was VERY disappointed.  I love my crisp.  Crisp.  I wanted crisp.  Ah well…at least, they tasted pretty good.

While the fries were undergoing their second frying, I quickly picked some lettuce from my garden and whipped up a quick vinagrette:

  • 1 tbl. balsamic vinegar
  • 1-1 1/2 tsp salt
  • couple of grinds of pepper
  • 1 tsp sugar
  • 3-4 tbl olive oil

I whisked the little puddle of vinegar, salt and sugar while slowly dribbling in the oil so that it emulsified.  Quickly chopped a tomato and voila…salad!  I sliced the steak on the diagonal into fairly thin slices, plated it all up, added a couple of slices of ciabatta that I had made the day before and dinner was served.  The steak was fantastic…really.  The marinade really did the trick.  The fries were unfortunate in their limpness but they went well with the rest of the meal.  And, of course, we finished up with the ever delightful leftover Strawberry Blueberry Magic Cobbler.  If you gotta eat leftovers…that’s the way to go!

Ciabatta and Challah

Although still a bit behind others in the BBA Challenge, I’m beginning to catch up to the front-runners (not that it’s a race but it’s fun to be baking the same thing with a group of people).  Ciabatta legend has portrayed it as a notoriously difficult bread.  Achieving the proper holes critical to deeming it truly ciabatta.  And, I don’t know about you, but everytime I hear the word ‘ciabatta’ – even in my head – I hear it as ‘chi-BAH-ta chi-BAT-ta chi-BAT-ta’ – like a little dance tune – like Robin Williams saying, “maDONna maDONna maDONna” in ‘The Birdcage‘.  Probably just personal demons.

I approached the baking of the ciabatta with due caution and respect.  And a litle fear.  Who wants to end up with failed ciabatta (chiBAHta chiBAHta chiBAHta…sorry, I’ll try to stop)?  Many of the BBA challengers have posted wonderful pictures of their successful exploits.  Beautiful holes, golden crust, some have even been stuffed with the likes of caramelized onions and mushrooms (my stomach just grumbled at the mere thought of such delectables).  Now the moment had come.

I carefully read the instructions in The Bread Baker’s Apprentice several times.  Reviewed the pictures of the ‘stretch-and-fold’ maneuver.  Made sure my couche cloth was near at hand.  I was ready.

I had decided to do this bread entirely by hand (rather than using my mixer and dough hook).  In fact, I’ve been thinking of doing all breads this way from now on.  I think some of my previous difficulties like The Great Bagel Disaster and Casatiello may have their roots in relying too much on the mixer.  I have found that mixing by hand I have a much better feel for the dough (pun intended – sorry).  It’s also a slightly slower process so it’s easier to keep the dough in control.  With the mixer, there’s a tendency (on my part, at least) to feel I have to add more flour in order to get the dough to clear the sides.  But, often, I end up adding to much flour and resulting in a very stiff dough.  And once it’s stiffened up like that it’s next to impossible to re-hydrate it enough to become a lovely, pliable mass of dough.

Biga - cut up and warming to room temp

Biga - cut up and warming to room temp

The biga had been made the afternoon before and had about 15-16 hours of fermentation in the frig.  It looked quite puffed up when I took it out and cut it up into smallish pieces and it felt nice and soft.  I was a little concerned about doing the biga version (rather than the poolish one).  It seemed like adding lumps of dough to create a very wet dough would just result in lumpy dough (I speak, unfortunately, from experience).  But, from reading others experiences, it seemed that the biga was working out better hole-wise.

While the biga rested I decided to bake some Challah to take to our very good friend’s house that day.  Ellen loves Challah.  I had made the BBA Challah and it was pretty good but I found it a little drier than I like so I hunted around for another recipe and found this one.  It’s not that different from the BBA one but uses slightly less water, slightly more honey and egg.  And it’s fun to experiment.  I also did this one by hand.  
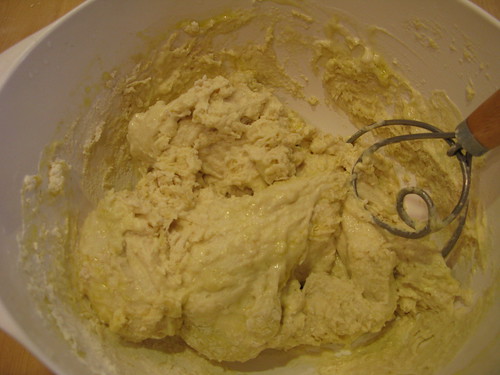
I mixed the dough up in a bowl using my dough whisk.  If you don’t have one of these babies, get one.  It makes mixing up even fairly heavy doughs by hand a snap and cleans up easily.  It’s great for lighter batters and such as well.  The dough quickly came together, turned out on my board, kneaded it for 5 minutes or so and it was ready for it’s first rise.

Then it was time to walk the dog and do a quick errand.  By the time I was back the biga was warmed enough to get going on the ciabatta (chiBAHta chiBAH…sorry, sorry).  I placed all the ingredients in a bowl adding the cut up biga.  Using my dough whisk, I quickly had a shaggy mass of dough.  According to instructions, I had a bowl of water nearby.  Dipping my hand in the water first, I used my claw, er, hand to knead the dough kind of like a dough hook would while turning the bowl.  I kept dipping and kneading until I had a nice, uniform and VERY wet dough.  It was kind of fun doing the whole wet hand mixing thing.  Like making mud pies.  Only slimier.

Once it was feeling good (pliable, smooth and, most importantly, wet), I made a little bed of flour on my board, dumped it out and formed a rectangle.  Now was the time for the first stretch-and-fold.  I was a little trepidatious but it was really easy.  The dough was very compliant.  I floured it and me well, carefully loosened it with a bench scraper and lifted each end.  Lo and behold…streeeeetch!  The folding part was a piece of cake…or bread.  Set it to resting and proceeded to shower and dress.  Once properly put together for the day (or as good as it gets for me), the ciabatta was ready for it’s next exercise period: streeetch-and-fold.  Back to resting.

After another 30 minutes or so, the ciabatta had risen A LOT.  It was a little scary how big the lump had gotten.  I figured this was signal to go ahead and shape it.  I had prepared the couche with lots of flour.  I cut the heap’o’dough into 3 pieces and easily shaped them into rectangles, placed them on the couche and rucked it up between them to form a nice, comfy coach…er..couche.  I puttered around a bit, tweeted, checked email.

The challah had swelled fairly nicely by now (it had been about 2 hours).  It didn’t really look doubled to me which was surprising as it was nicely warm in the kitchen but that’s how it goes sometimes.  I made an executive decision that it was ready for shaping.  And shape it I did.  I decided on two loaves as I wanted one for Ellen and the other to take to my mother.  She, my mother, had complained that I hadn’t brought her any of the other challah so I hoped this would make her happy (or as happy as my mother gets).  After wrestling with the braiding, I got them nicely shaped.  I don’t know why the braiding is so hard…I have no trouble braiding hair.  (I actually think I may have figured it out during a dream…so we’ll see next time.  And why I’m dreaming about making bread rather than hunky men I don’t know but it’s very disappointing.)

My husband returned from his workout and proclaimed his imminent starvation.  Since I wanted to bake the ciabatta before going anywhere I got him to put his tummy on hold for an hour.  I figured I could refrigerate the challah braids and bake them when we came back but I didn’t want to the ciabatta to wait and it bakes really quickly.  I decided, since I had three pieces, to experiement a bit.  So I heated up my stone in the upper oven and my La Cloche in the lower oven.  If you haven’t seen the La Cloche you should check it out.  It’s a great substitute for an oven hearth.  I was really curious to compare and contrast.

Once the ovens were heated, I floured my Super Peel (another REALLY handy item) with semolina and transfered two of the loaves to it.  Again, it was quite easy although the dough is quite soft.  Just a bit of help with the bench scraper and they were on the peel.  From there it was easy to transfer them to the hot stone in the upper oven, dump a cup of water and close the door.  The third loaf was transferred to the re-dusted peel and this one was placed in the La Cloche.  It was a tiny bit long for the round base but it smooshed itself into a slight curve which was fine with me.  I replaced the cover and closed the door.  Spritzed the upper oven a couple of times.  And let them all all bake.

In just 15 minutes all three had reached the requisite 205 degrees and were ready!  It was quite interesting to see the difference in color between the two.  The ones done in the oven on the stone were pale golden colored.  The one in the La Cloche as a much richer gold.  I left them to cool (even though hardly able to wait to see the inside), stuck the braids of challah in the frig and we were off to lunch and errands.

The La Cloche baked one is on the right

Returning home the moment of truth arrived.  I sliced one of the stone made breads and it looked good but, alas, no big holes.  The texture was quite nice and the taste was good although a little bland.  Then I tried the one made in the La Cloche and, I think, there was a significant difference.  The texture was MUCH more open.  No huge holes, but lots of medium size ones.  The taste was similar to the others but the texture was lighter, less chewey.  All-in-all I’m calling them all a success.  I really enjoyed making them.  Working with the wet dough was a lot of fun and actually quite easy.  And I’m eating ciabatta dipped in a little olive oil as I write.

Stone Baked Ciabatta

Stone Baked Ciabatta

La Cloche Baked Ciabatta

La Cloche Baked Ciabatta

And the challah?  They had huge oven spring.  They looked beautiful coming out of the oven.  We left shortly after for Peter and Ellen’s (to spend 4th of July lolling at their pool) and Ellen’s challah was still warm when we got there.  She received it delightedly and tore into immediately.  I must say that once I got a look at it (after prying her fingers off the loaf and making her stop shouting, “mine, mine”) that it was a significantly fluffier texture than the BBA challah.  The taste was excellent, a little more egg-y and sweeter.  Now I may have to try others or experiment with these because leaving well enough alone is just no fun at all.

Blueberry Fever!

Strawberry Blueberry Magic Cobbler

There have been so many wonderful posts and recipes going around the blogosphere for various ways to transform lovely blueberries into heavenly concoctions that I can’t resist!  Leaving aside the Nightmare in My Closet, I am throwing caution to the wind, putting my foot down, taking a stand (and other similar cliches).  I love sweets, I love blueberries and, damn it, I’m eating the wonderful bounty that nature, careful genetic breeding and copious quantities of sugar provides.

I had wonderful success with the Blueberry and Strawberry Buttermilk Cake from Pinch My Salt.  It was a key element in my Unplanned Dinner.  I don’t think that post really did it justice.  It is a very simple cake to put together.  And the quantities called for make a small cake which is nice when there’s just two of us.  With great restraint we finished it off over two days (rather than just eating it all at one sitting which is what I really wanted to do).  Each mouthful was delicious.  It’s hard to beat the combination of blueberries and strawberries and the cake was not at all sweet which really let the berries shine.

Now that I had tasted this creation I was eager to see what else I could make.  I have a weakness for cobblers and crumbles (buckles, trifles and fools as well).  While this may be sacriligious to say, I often much prefer fruit based desserts to chocolate ones.  I know, I know… heretical.  But there it is.  So, after surveying the territory of blueberry creations and finding LOTS of fabulous sounding ones, I opted for one that sounded very simple to put together and emphasized the berries.  The title of it,  Strawberry-Blueberry Magic Cobbler on the Eating Out Loud blog appealed to me because, well, it has ‘Magic’ in the name so it must be good!  Plus the author gave lots of kudos to his mom which I always think is important.

Like the Buttermilk Cake, this dish went together VERY easily.  It really was magical.  I’ve come to really like recipes that don’t require using heavy equipment.  In some ways, it’s just a lot more fun to mix the stuff by hand.  I’ve been finding the same thing with my bread making.  I prefer to knead the dough by hand.  I get a much better feel for what’s going on and things don’t get away from me so easily.

Blueberry Strawberry Buttermilk Cake

This cobbler, which is really more like a buckle/crumble but let’s not be too technical, came together literally in minutes.  Cutting up the strawberries took longer than mixing up the batter.  The author suggested just melting the butter in the pan as the oven heated, so I did.  Quickly mixed together the usual suspects: flour, sugar, salt, baking powder, cinnamon with milk to form a very loose batter.  Pour (literally…it’s really soupy) the batter into the pan with the melted butter.  Evenly spread the berries on top of the batter, followed by sprinkling brown sugar and walnuts (the recipe called for pecans…I had walnuts…worked fine).  Pop it in the oven for 45 minutes or so.  And that’s it!

I must admit I was a little dubious when I saw how watery the batter was.  But I figured I couldn’t go that far wrong with all the fruit and sugar!  And, boy, was I right.  After 45 minutes, maybe a smidge less, the gloop had turned into a beautifully browned cobbler (buckle, crumble).  It looked amazing.  Smelled amazing.  Had to restrain myself from digging in right then.  Instead, served up dinner for me and the hubby while it cooled.

Dinner behind us it was time to give it a try.  I served it up with whipped cream (from my handy nitrogen-charged canister I keep in the frig for any whipped cream emergencies).  As you may have already guessed, it was fabulous.  Similar in taste to the Blueberry and Strawberry Buttermilk Cake (after all, it had the sam berries) but the brown sugar and walnut crumb on top really added a nice dimension.  My husband, the house food critic, gave it a gleeful thumbs up.

Both these recipes were really excellent and we loved the results.  The cake is a little more substantial feeling in the mouth.  The cobbler is more light and heavily fruited.  I will be making both again.  And again.  And again.

When Good Dinner Plans Go Bad

I had a wonderful plan for dinner last night.  I had some chicken kebobs all put together and ready to be thrown on the grill when I got home.  I wanted to make the Blueberry and Strawberry Buttermilk Cake that was posted on Pinch My Salt (thanks Nicole!) as a perfect summer dessert.  I figured I’d pick some greens from my little container garden so we’d have a salad.  It was a beautiful plan.

That’s when reality stepped in.  After visiting a bit with my husband, I was ready to set the plan in motion.  I went outstide to turn on the grill so it could heat while I prepared the batter for the cake.  And, you guessed it, it wouldn’t light.  I think I may have inadvertantly left the gas turned on a tiny bit so there wasn’t any.  I fruitlessly pressed the ignition button several times…nothing.  Grrrr.

Okay…now what’s for dinner?  I didn’t want to try grilling the kebobs indoors…they really cried out for a real grill.  Hmmm.  Well, I figured we could still have the planned dessert.  I put together the batter while thinking about what else to make.  It’s a lovely, simple recipe and the batter came together easily.  I put it into a square pan (rather than the round pan suggested) and popped it into the oven.

Meanwhile, I had figured out an alternate entree.  I had some skinless/boneless chicken thighs in the frig waiting for an idea.  I quickly lined a quarter sheet pan with a couple of layers of aluminum foil and layed out the thighs.  A liberal sprinkling of salt, some pepper and lavish paprika.  Then I dotted each with a dab of butter.  I placed the pan under the broiler for about 5-6 minutes.

During this lull I contemplated side dishes.  I popped out to the “garden” (I have a tiny yard with a bunch of containers holding tomato, cucumber, pepper, butternut squash, lettuces and herbs) and picked some lettuce and a nice little cucumber.  Okay, salad taken care of!  Then I remembered two things:  1) I had some cooked rice that I had frozen in the freezer (Mark Bittman had a great article on freezing stuff) and 2) I “forgot” to put the berries on top of the cake.  Yes, that’s right, the berry cake was berry-less.

I checked the cake (it had been baking for about 15 minutes) and it was still very soft so I went ahead and put the berries on top and kind of smooshed them down a little with my hand.  This is what comes of reading a recipe too fast…you might miss a thing or two.  Back in the oven it went.  Within a minute or 3, I remembered I hadn’t sprinkled with sugar…so, opened the oven, grabbed a spoonful of sugar and sprinkled.  Sheesh.

I turned the thighs, sprinkled with more salt, paprika and butter.  Back under the broiler for another few minutes.  By now I had placed the frozen rice into the microwave and it was, theoretically, defrosting.  When I opened the microwave to pull it out I learned an important lesson: don’t touch really hot, steamy stuff with your bare hand.  Boy that was hot.  I pulled the mostly defrosted rice out, sprinkled it with salt and pepper and a little olive oil, mixed it well with a fork and put it back in to heat through.

Now the cake and the chicken thighs were done and both were removed from the oven.  The cake to cool on a rack and the thighs to rest.  While the thighs rested, I made a quick oil and vinegard dressing for the salad (basically I just plated the greens and some cucumber slices, applied a little salt and pepper and drizzled with olive oil and a touch of cider vinegar.  Then I sliced the thighs cross-wise and added that and the rice to the plate.  While the cake cooled, I served up our little dinner.  I briefly explained the whole plan snafu thing to my husband and, after tasting the thighs, said that my “alternate plan was better than most people’s plan.”  He’s a keeper.

Once dinner was finished, the cake was cooled.  I dished each of us a piece and garnished with whipped cream (have I mentioned that I keep a nitrogen charged canister with cream at the ready in my refrigerator?).  The cake was delightful.  The berries had only sunk in a bit but that was actually fine.  The late addition of sugar created a nice little patina on the top.  My husband’s verdict?  “I could eat this everyday!”

Nightmare in My Closet

You’d think you’d be safe in your the privacy of your very own closet. In fact, Gyro (our much loved Corgi), spends a great deal of his time in there. We refer to him as ‘Closet Dog.’ Given Gryo’s un-courageous personality, I figured the closet is pretty-much the safest place in the house. Unfortunately, I keep the scale in there.

Most days I ignore it or throw it a dirty look or give it a little kick (just to show who’s in charge). Every now and then, if I’m feeling very confident and, well, light, I’ll gingerly step on. But if it looks like things aren’t going my way I just as gingerly hop off. This morning it was laying in wait.  I could hear it whispering, “C’mon…you look a little thinner…i’ll be kind…don’t worry…”  Freakin’ viper.

Of course, I knew all this bread baking, cookie making, recipe experimenting and maybe a little bit too much crap-snacking at work might have led me to eat a teensy-tinsey bit more than usual. (I define teensy-tinsey as more than twice as many calories as required. Why? How do you define it?) And I have the occasional feeling that my clothes have shrunk or been replaced by evil gnomes with clothes a size or two smaller. (Gnomes being the only reasonable explanation I could think of.) Today, though, some evil part of my brain said, “C’mon…you should just check and see if you’ve picked up a couple of pounds. It’ll be fine…” And, like an idiot, I listened to that voice.

After the screaming, teeth gnashing and tears abated I realized that I had some choices:

  1. Ignore the whole thing. Who’s that scale to tell me how to feel about my body?
  2. Go on a diet. After all there are probably one or two diets I haven’t tried yet.
  3. Focus on eating only “healthy” foods in moderate amounts. This should be a piece of cake (oops celery?)…right?
  4. Embrace my roundness. Assuming my arms will reach around.
  5. Figure out how to keep eating the things I love. Hmmm…isn’t that how I ended up here?

As may be obvious, I’ve struggled with “weight issues” all my life. I was a slightly chubby kid, who grew into a slightly chubby woman. I’ve been susceptible to the hunt for the “right” diet forever. I have been on pretty much every diet there is: low calorie ones, low fat ones, low carb ones, South Beach, Ab Diet, Hawaiian…you name it and I’ve either tried it or know about it. I’ve tried resigning myself to my body. This is who I am. A short, roundish woman. Sort of like a teapot. I’m never going to have long legs. Lithe torso. Skinny arms. Just writing that makes me want to run screaming into the streets berating the gods for sticking me in this plump pot.

And, sadly, making the mistake of putting my tootsies on that stupid scale pretty much ruined my mood. Instead of feeling my usual chipper self I entered a darker corner of my mind. Inner conversations that berate and ridicule. Empty promises of resolution and abstinence. But, to be honest, I’m just tired of the whole thing. I enjoy cooking and baking and eating. I enjoy thinking about it. I enjoy doing it. I find the whole process of reading about food, recipes, techniques and then trying them and, of course, tasting and sharing the result, to be very fulfilling. (Yes, maybe a little over-fulfilling.)

After reviewing the list of choices, I think #5 is my only real option. Yes, I can figure out ways to “lighten” recipes as long as I don’t have to sacrifice quality. I can continue to work on my body issues and emotional eating behaviors. And I can refuse to let the scale or the world-view it represents dictate how to feel about myself.

At least I can try. There’s a good post at A Tiger in the Kitchen about similar issues. Any thoughts from you would be helpful and are very welcome!

Weekend Cookies

Weekend cookies!  I’ve been trying different cookies, bars and brownies each weekend and sending most of them with my husband to his work.  He claims it helps to get people to look forward to attending the many meetings that occur at his company.  I take some to my work too but we’re a much smaller company so we don’t have that many meetings or people.

It’s really great fun and gives me an opportunity to explore small scale baking.  I find baking these little treats to be quite fun and gratifying.  Of course, now people at hubby’s work expect him to bring treats.  They’re even making requests.  “I can’t eat chocolate.”  “Something more healthy.”  “More chocolate.”  Plus my husband announced that his favorite is shortbread.

So I decided to compromise.  I made some classic shortbread and then dipped half of them into dark chocolate.

That left the request for something healthier.  So I decided to make use of in season blueberries and make some mini-blueberry muffins.  They might have been in the oven a tiny bit too long but they taste quite yummy and have a nice crisp top.

There, now everyone can be happy..’cause blueberry muffins have fruit and fruit is healthy….right?

Casatiello and Challah

Still trying to catch up in the BBA Challenge, I baked two breads yesterday:  Casatiello and Challah.  I was really looking forward to the Challah.  It’s a bread I “get” – rich taste, soft texture, braids; it’s got it all!  On the other hand I had never heard of Casatiello and, true to human nature, I was a little wary.  Maybe even a little scared.  What kind of bread has cheese and meat in it?  Fruit sure.  Nuts, why not?  But meat?  I approached the endeavor cautiously but figured if Peter Reinhardt gives it a whole chapter who am I to scoff?

Compounding the complexities of making the breads I have a whole schedule of activities on Saturdays.  I like to do a nice, long walk in the morning while my husband works out with his trainer at the pool.  Then we rendezvous and go out for lunch.  That’s usually followed by either errands and/or looking around at the bookstore or the mall.  How was I going to be able to perform all the steps required after the various fermenting pauses?

Since this challenge, for me, is meant to be a learning opportunity, I decided to experiment with a combination of normal and retarded fermentation.  I prepared the sponge for the Casatiello and set it out to proof.  Then I quickly gathered the ingredients for the Challah, put them into the mixer and let it do it’s magic.  In a few minutes, a lovely ball of dough had formed.  I took it out, hand-kneaded it for a bit (just because I enjoy the feel of the dough) and set it in a bowl for it’s first fermentation.  Then it was off for my walk.

Everything ready for the Challah

Everything ready for the Challah

It was a beautiful day here in San Diego.  Hopefully, we’re finally coming out of the “June gloom.”  It was just the right temperature and the park was filled with people and dogs and activities.  I enjoy that feeling of getting outside, moving my body and seeing other people.  Even though much of what I enjoy doing are solitary pursuits (baking, gardening, yoga, reading) I do enjoy seeing and interacting with people.  It’s part of the reason I enjoy blogging.  The feeling (if not always the reality) that I’m communicating with others and sharing my life.

Back from my walk and the Casatiello sponge was nicely bubbly. Time to make the dough.  This is when things got a little wonky.  I added the sponge and egg/milk mixture to the flour, sugar, salt mixture.  It was still pretty sticky so, as the book says, I started gradually adding flour so it would form a ball.  I thought I was doing this very gradually (although I’m always afraid of over-mixing).  Suddenly, it seemed, the dough was a tight wad that my mixer couldn’t even mix.  The dough felt really, really stiff.  I had used buttermilk for the liquid and, perhaps, there was too much milk solids and not enough liquid?  I decided to dribble in a little regular milk to try and de-solidify the mass.  It helped some and the mixer was able to mash the dough some.  It was still pretty stiff and lumpy.  (I was now concerned that I had another disaster on my hands ala The Great Bagel Disaster). Undaunted I started adding the butter.  Of course, since it was still a pretty stiff mass of dough the mixture was having a lot of trouble incorporating the butter.  More like the outer part of the dough was getting nicely buttered while the inner part remained impervious.  I decided to add a bit more milk and that seemed to help relaxing the dough enough to get the butter more-or-less in.  It still looked like the buttery dough was wrapping an inner core of non-buttery dough.  So I took it out and worked it by hand.  Doing this I was able to get it to a state resembling a uniform bread dough.  It still seemed too stiff, especially compared to the Brioche I had made the previous weekend.  I actually considered just chucking the whole thing.  Who cares about Casatiello?  Never heard of it anyway.  Grumble. Grumble. Grumble.  But, I figured, I’ve come this far I might as well see what happens.

Casatiello fixins

Casatiello fixins

I had my cheese and salami all ready.  I had decided not to crisp the salami.  It was a quite hard German salami and it seemed just fine the way it was.  I was able to gradually incorporate all of it into the dough.  As I added each handful, I kept thinking, “I’m never going to get all of this into this dough.  Not gonna happen.”  But, miraculously, it all got worked in.  It was now a VERY stiff dough but I dutifully coated it with oil and set it out to double.

A dough only its mother could love

A dough only it's mother could love

The Challah had completed it’s first rise so I took it out, briefly and softly kneaded it to degas and returned it to its bowl.  I showered and dressed.  Did a couple of small chores and the breads were ready for the next steps.  First, I separated the Challah dough into 3 portions, shaped them into little boules and let them rest.  Meanwhile, I prepared the pan for the Casatiello.  I decided to use a 9″ springform pan, sprayed it with oil, lined it with parchment and a parchment collar and then sprayed everything again.  I shaped the Casatiello into a boule and placed it into the pan.  The Challah pieces were nicely rested by then and I shaped each piece into a a strand and braided (only later did I realize I had slightly screwed up the braiding but I decided to ignore that mistake because it still looked pretty cool).

My husband was now ready so I popped both the Casatiello and the Challah braid into the frig and we were off.  We had a very pleasant afternoon and ended up buying a Wii (and a Wii fit).  I’m promised that this is going to be fun.  We’ll see.  I was eager to get home and see how my doughs had fared in their hibernation.  To my pleasant surprise, the Challah had doubled in size and looked fantastic.  The Casatiello had also grown…perhaps not double but definitely a lot bigger.  I decided the Challah was ready for baking and pre-heated the oven, washed it with egg whites and decorated with sesame seeds.  In it went.  Since the Casatiello was rock hard (the butter, I imagine, having hardened in the refrigerator) I left it to sit out on the counter and come up to room temperature.

The Challah looked great going into the oven and even better coming out!

You can see the braiding error (toward the top of the picture) but I think it just makes it look interesting (that’s what my mother used to tell me anyway).

The Casatiello had warmed to room temperature but hadn’t really changed in size so I figured, what the heck, and popped it into the oven.  At this point my husband yells “let’s go in the hot tub!”  Now?  Now you want to go in the hot tub?  I’ve got bread in the…oh what the heck, it’s probably doomed bread at this point anyway.  “Sure!” I bellow back.  By the time we’re ready the Casatiello has been in the oven about 20 minutes.  I rotate it and set the oven automatic turn-off for another 20 minutes.  I figure it would take longer than that but by the time the oven cooled it would have plenty more baking time and, worst case, I could turn the oven back on for a bit.  I realize I was asking a lot of the poor thing but one has to embrace life’s opportunities.

Off we went.  I came back to the tweeting of the timer on the oven.  I checked the internal temperature and it was only up to about 140.  So I cranked up the oven and gave it another 15 minutes.  And then another 10.  And then another 10.  And then maybe 5 minutes more until it finally reached 190.  That thing is dense.  I placed it on a rack to cool and prepared dinner.

Now I had planned that the Casatiello would mostly be dinner and I was stickin’ with the plan.  (I had meanwhile tasted a snippet of the Challah which was excellent!  Beautiful golden color, moist open crumb and delicious delicate flavor.  Ahhh.)  I knew I wanted a berry mix so I cut up strawberries and nectarines and sprinkled with a bit of sugar.  Added some blueberries and topped with whipped cream (I keep one of those whipped cream canisters in the frig at all times in case of a whipped cream emergency).  Then, since I felt the Casatiello would be a meal in itself, I sliced some nice tomatoes, picked some lettuce from the garden, prepared little dishes with mustard and mayo and presto! Dinner.  (My husband got some extra fruit because he’s bigger.)  I tentatively cut into the Casatiello expecting the worst.  To my utter astonishment it looked (and smelled) heavenly!  The bread was a little dense but, regardless, it tasted fantastic.  The wonderful combination of cheese (I used a combination of mozzarella and Monterey Jack because that’s what I had in the house) and the German salami wrapped in the rich bread.  It was a total taste explosion in my mouth.  Way beyond what I was expecting so I was very pleasantly surprised.

I served up our little meal and my husband warily poked at the bread and held up the little dishes.  “What’s this?”  Mustard.  “What’s this?” Mayo.  I explained that the bread contained meat and cheese and I thought it would be nice to just condiment it and add some tomato.  He looked dubious right up to the moment that he got a bite into his mouth.  The look of sheer pleasure was well worth the effort.  “I love this honey!  It’s just like a Lunchable only all together.”  High praise.  High praise indeed.

Coda:  My husband has requested that we have some more of “that” bread with scrambled eggs tonight.  The man is a genius.

Rubbing Lotion into Paws

Yes, you read that title right.  I am tasked with rubbing special (antimicrobial) lotion into Gyro’s paws.  And, to add insult to injury, not for the first time.

Gyro, our beloved but aged Pembroke Welsh Corgi, requires excessive ministration again.  He’s always been an itchy dog (allergies) but last year he itched (or more properly scratched) himself into a severe illness.  Multiple very bad infections of his skin, papilloma wart on his foot requiring multiple surgeries, chewing his paws into little bloody hamburgers, demodex mites, eye infection…he was a mess.  For a while, he was so ill we didn’t think he was going to make it.  He was on 8 different medications twice a day (including a potentially poisonous one for the mites), I was medicating his paws twice a day and giving him 3 baths a week.  For months.  Not to mention the cost.  Let’s just say he’s approaching the “Most Expensive Dog…Ever” category.

And he recovered!  It was miraculous.  Much of his illness had been exacerbated by being on Prednisone for many years (to control the itchiness).  Prednisone works by suppressing one’s immune system.  This was a very bad thing once he got those infections.  They just overran his system.  So no more Prednisone.  One very itchy dog.  But he (and we) have been living with the itchiness.  Giving him Benadryl and baths.  And, although the illness took a lot out of him, he’s been pretty much fine.  Old.  But okay.

Recently he was scratching much more than usual.    He could barely take 3 steps without having to stop and scratch something.  I took him to the vet a couple of weeks ago and, sure enough, he had a bacterial and yeast infection.  Back on meds he went.  After the full course of meds he seemed even itchier than usual.

Rather than going back to our regular vet, I took him to the doggie dermatologist (yes, there is such a thing) that he had seen last year and who had pulled him through.  You know you’ve had way too many vet bills when everyone at the Animal Specialty Hospital greets you and your dog by name.  The technicians cooed over Gyro.  He is pretty great.  And he eats up the attention with a spoon.

After some skin scrapings (always fun), poking and prodding it was decided that he, indeed, had a bacterial and yeast infection.  The dermatologist took a sample and is culturing his bacteria as she thinks it may be an antibiotic-resistant staph strain.  That’s our Gyro.  A real over-achiever.  She suggested a super-bath at the the hospital so Gyro had a spa afternoon and I went back to work.  I picked him and all his new meds up in the evening.  After recovering from seeing the grand total for the little visit (no paramedics had to be called but it was a close call) we returned home.

So, now he’s on 2 meds (more to come once we figure what the bacteria is) plus a body spray (to help with itchiness and reducing yeast growth – I just told him it would make him pretty and he was into it), and, yes, lotion for his feet.  I rub his little paws twice a day with a very nice feeling lotion.  Talk about a dog’s life.  I should be so lucky.

Pizza on the Grill – Sssssmokin’!

Since I’ve read Artisan Bread in Five Minutes a Day it has revolutionized my daily repertoire.  I’m now able to product home baked bread at the drop of a hat (more-or-less…if the hat isn’t falling TOO fast).  The book and it’s method is so simple and easy.  I mix up a batch (the basic recipes are designed to make 4 one-pound loaves but can be halved or doubled easily).  The dough can be used in a variety of ways: boules, ciabattas, baguettes and, perhaps most happily, pizza dough.

My dear husband’s favorite dinner is pizza.  That’s what he says if asked.  He doesn’t specify any particular toppings, crust, source or method.  Just pizza.  He’s endearing in his simplicity.  That’s what I like to call it.  Simplicity.

I’ve made (and bought) pizza for us in a variety of ways but recently I read about making pizza on the grill.  Not directly on the grill (that would be a rather messy endeavor) but by placing a pizza stone directly on the grill, letting it heat and then baking the pizza.  The difference between baking on a stone placed on the grill and one in the oven is that the grill can achieve much higher temperatures than the average home oven.  So the stone gets much hotter and, because it’s stone, retains that high heat so your pizza dough gets a nice, crispy crust on the bottom.

Between the pre-prepared dough and the grill it’s a very easy meal in both preparation and clean-up.  I pulled off a couple of hunks (approximately 1 pound each) off the mass that’s been in my refrigerator for about a week.  I shaped each into pizza shapes.  One was kind of square’ish and the other pretty round.  The dough straight from the frig is a little reluctant to be stretched.  I let it rest a couple of times but probably not long enough (maybe 5 minutes) so it didn’t stretch quite as evenly and compliantly as I would have liked.  But, whatever.  Square, round, triangle…it’ll still be pizza.

I’ve tried two different stones on the grill.  Supposedly you should use a stone that has been specifically designed for being used on the grill.  They don’t really look any different from the one I’ve been using in my oven for years but it’s always fun to buy stuff.  One I got from Breadtopia and the other, a Mario Batali, from a local store, Great News.  The Breadtopia one has a bit of a texture and comes in a metal tray.  The stone goes on the grill in the tray.  The other one comes with a pretty cool looking cast iron holder that you place on the grill and the stone goes on it.  Apparently, you can’t place the stone directly on the grill or it will explode or something.  I haven’t noticed a significant difference yet but I would say the Mario Batalio one seemed to get hotter and it looks a lot cooler.  But they both worked fine.

My first endeavor (a couple of weeks ago) was a partial disaster.  Nothing to do with the technique…just the cook.  I prepared the dough and put the toppings on.  All was ready.  I was using a flimsy, plastic cutting board to prepare the dough but I hadn’t put much flour or cornmeal on it.  I used the “board” to transfer the dough to the grill.  Did I mention it was dark by now and I hadn’t yet gotten my handy solar-powered LED grill lamp.  As I tried to shuffle the dough off the plastic thingy, it stuck some.  Using a bench scraper I tried “encouraging” it but one corner kind of flipped under as the whole thing plopped onto the hot stone.  Nice hot cheese now welded the dough to the stone.  I let it cook and was able to scrape the cheese off the stone.  After 10 minutes or so the dough (that was left) was done and I scraped the whole mess off the stone, onto a plate.  It was actually pretty tasty albeit hideously mis-shapen.

Undaunted, I was trying again.

As mentioned the dough was shaped, rested and shaped some more.  I added a simple topping of sliced tomatoes, sliced red sweet peppers and lots of cheese.  On one it was all mozzarella and the other a mixture of white cheddar and mozarella (that was more of an accident because white cheddar looks a lot like mozzarella…just FYI).  I used my Super Peel (which if you haven’t seen one or don’t have one…well, go get one…it’ll make your life much easier).  They each cooked on the stone for about 10-12 minutes and came off the grill looking wonderful.  Crust nicely crusty on the edges, crispy on the bottom.  Cheese bubbling.

And my husband loved them.  Really.  I got “this is the best pizza I’ve ever had.”  High praise.  And well-deserved.